In earlier blog posts (this one and this one) I’ve talked about two – seemingly opposing – views of math instruction: direct instruction and student-centered instruction.
There is plenty of evidence that students benefit tremendously when given an opportunity to invent/investigate their own understanding prior to formal instruction by the teacher.
There is also plenty of evidence that direct instruction supports students to efficiently learn discrete skills and standard algorithms.
When thinking about teaching mathematics, you don’t have to pick a side. Rather, think of each instructional strategy as a tool. For some jobs, one tool is better than the other. I recently built a chicken coop…I used a variety of tools depending on the need at the moment. This is exactly what we will do when teaching mathematics.
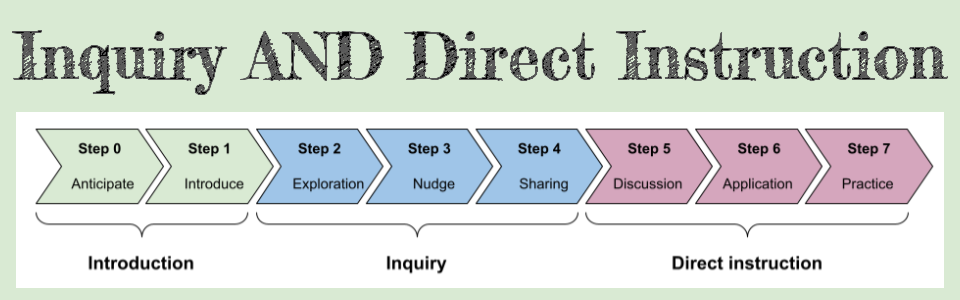
Here are the 8 STEPS of my mental model for a lesson that incorporates moments of both inquiry AND direct instruction in a typical 45-minute math lesson.
STEP 0: Anticipate
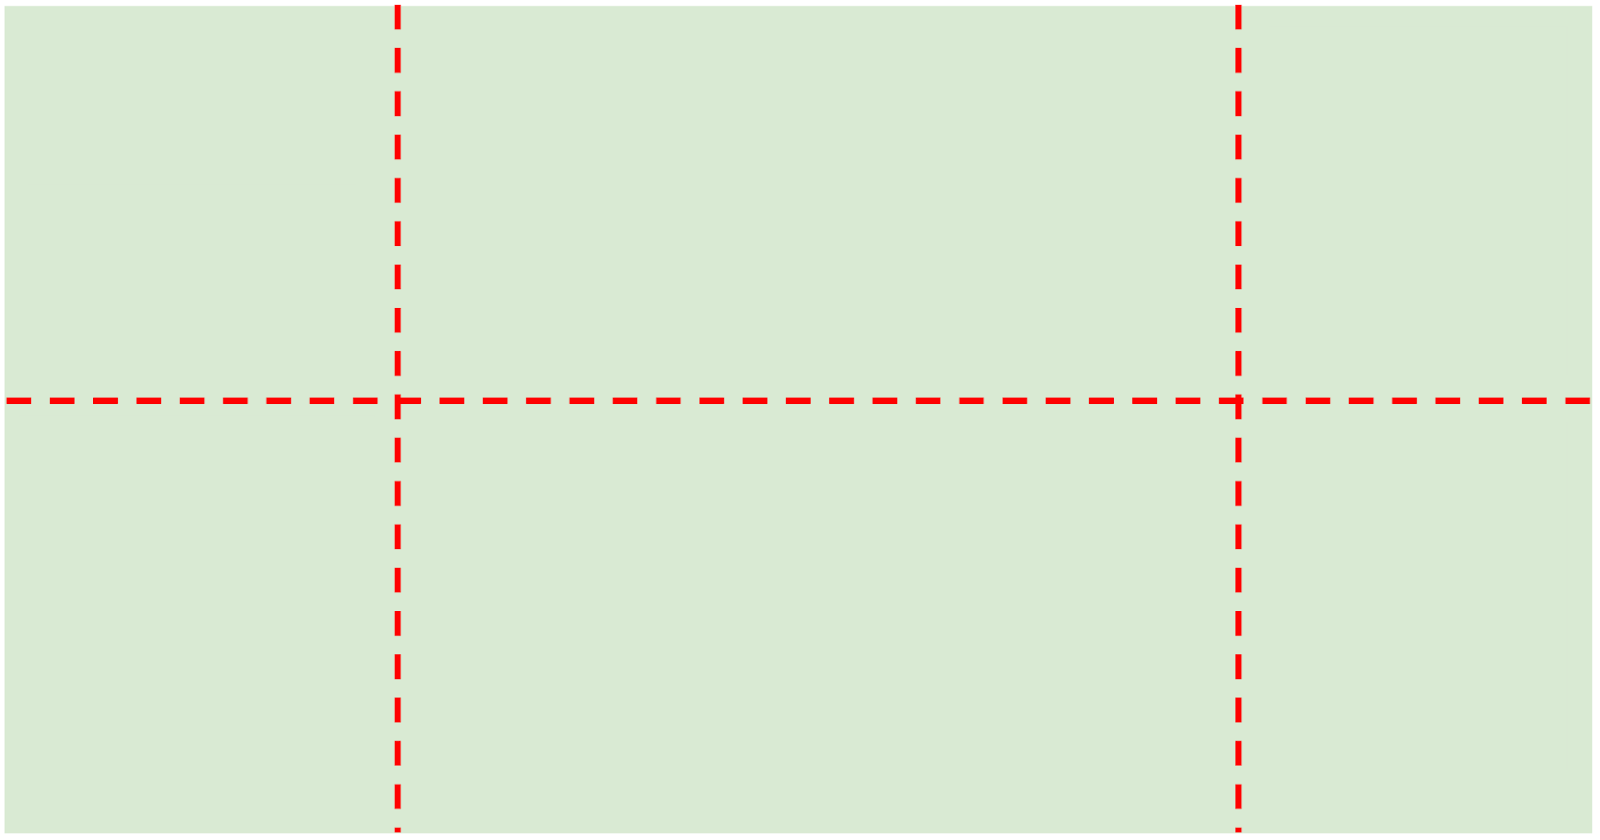
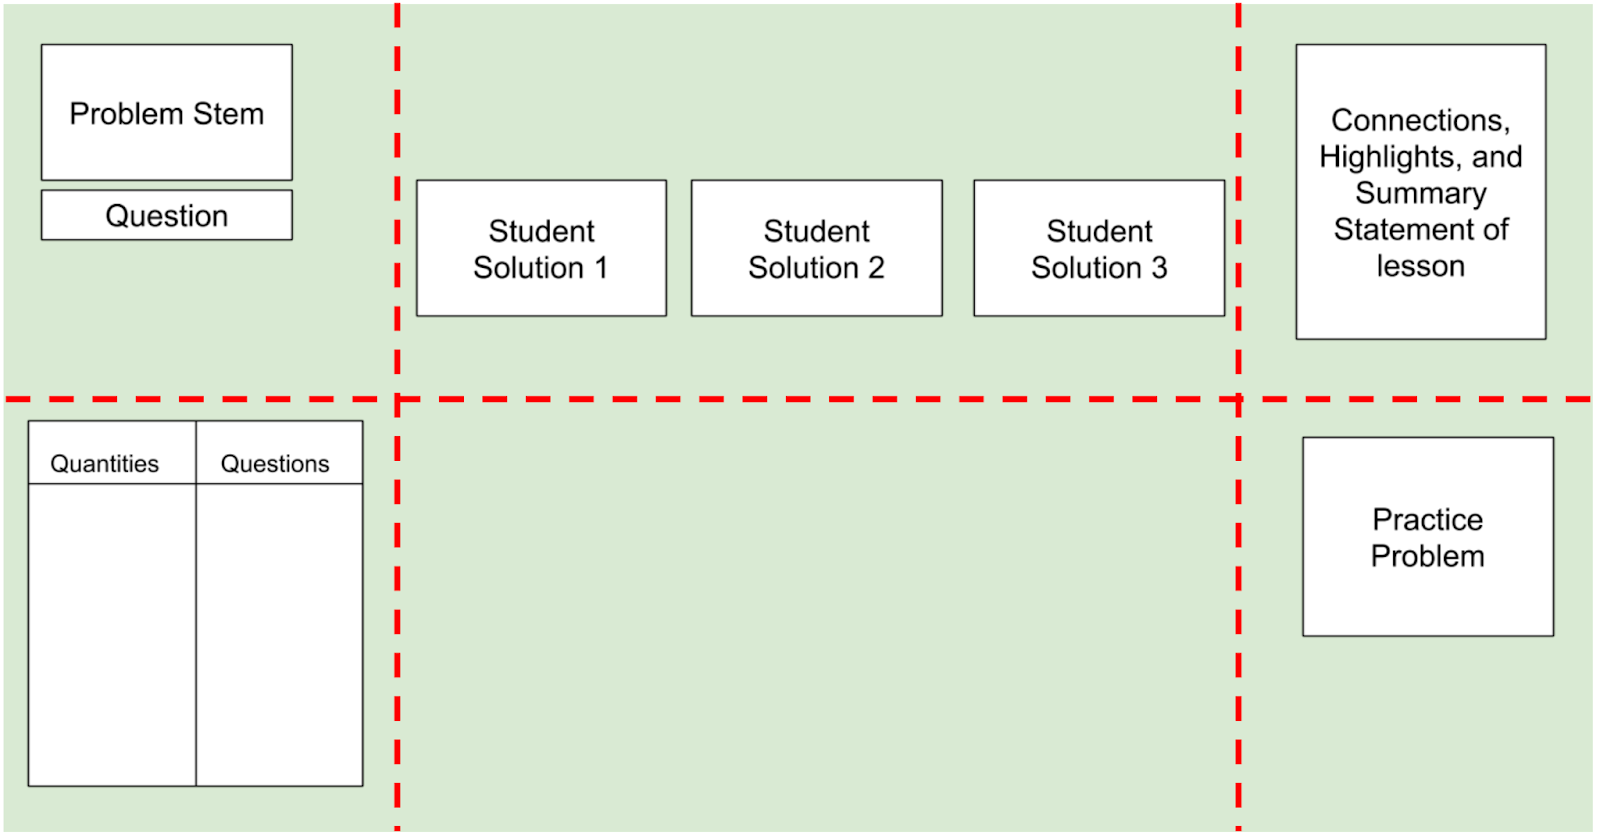
I start with a blank whiteboard and imagine it being cut into eighths. I anticipate what will be written in each of the six regions so as to avoid the need for erasing anything.
STEP 1: Introduce
I start the lesson by presenting a word problem in the upper left corner of the whiteboard. I often separate the problem stem from the question stem to allow students a moment to think about the “math story” without having to worry about trying to solve anything yet.
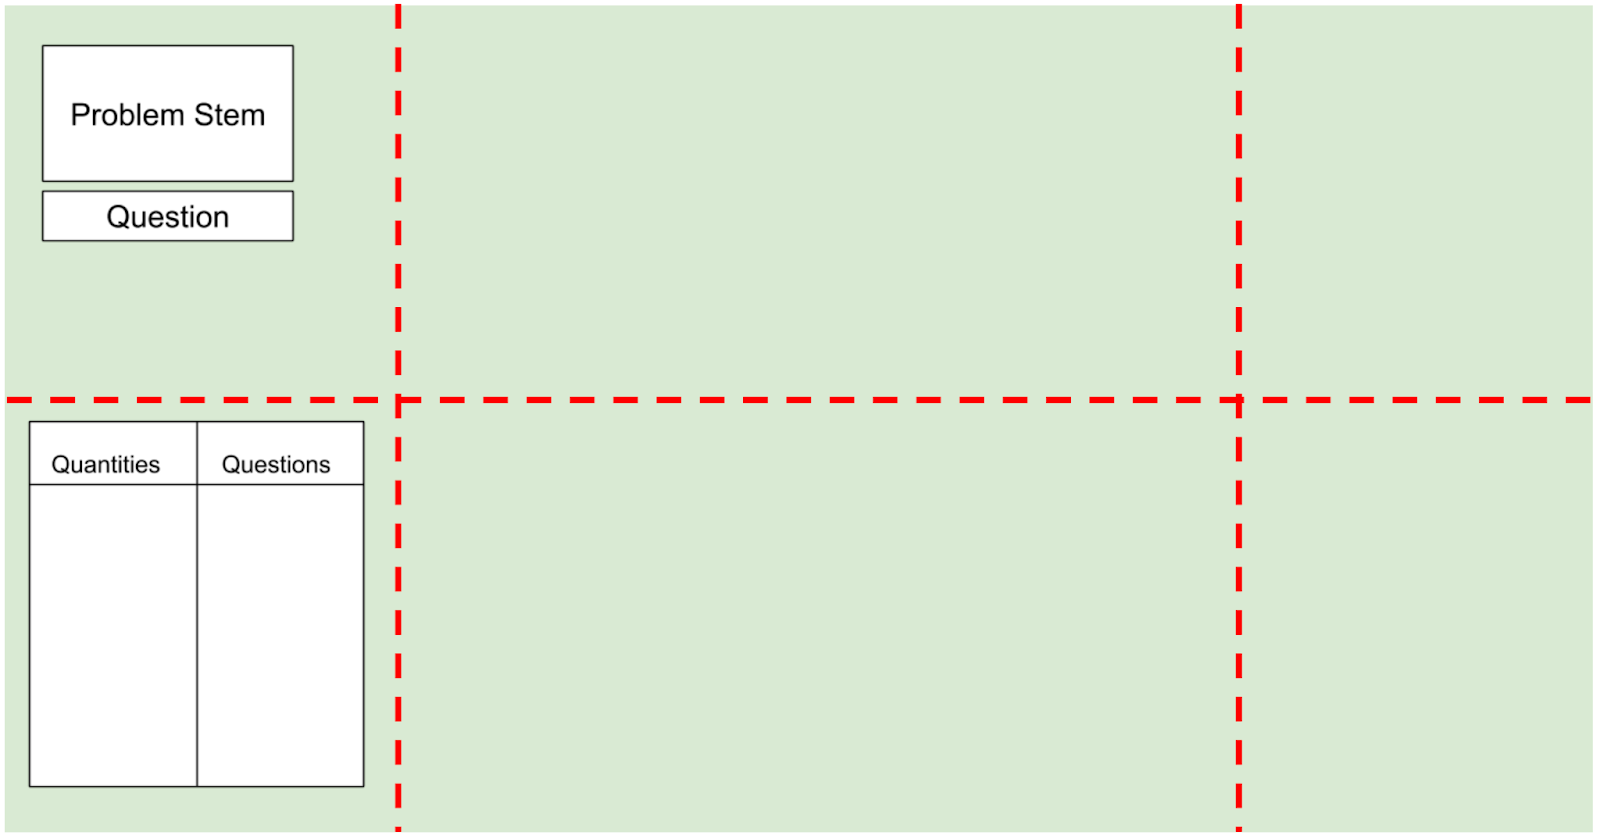
Sometimes I introduce the problem to students using the Three-Read Protocol. Other times, I just give students a moment to identify words they can’t read or don’t know before revealing the question stem. Only after unfamiliar words or contexts are discussed do I reveal the question stem.
STEP 2: Explore
I tell students to represent the problem using any method of their choosing: concrete materials, pictorial representations, or numbers and symbols. I also remind students they are not required to use “the official math” we have been learning in the math unit and that they may use any method to solve the problem.
Students grapple with this problem and invent their own understanding of the problem. Students generally work alone and/or with a partner. During this time, students invariably provide me a tremendous amount of formative assessment data of what they know and don’t know. I will use this information later during direct instruction.
STEP 3: Nudge
As students are working, I can nudge the entire class in a particular direction by finding a student who is doing something I want ALL students to do. (This is likely something directly from the teacher notes of today’s lesson.). I hold up that student’s work for the class to see and tell the rest of the class to “give it a try”.
It might sound something like…
- Elementary school: “Hey everybody! Look at what Alonzo is doing. He drew circles to represent the students. Can you all draw circles too? Give it a try.”
- Middle school: “Hey everybody! Look at the tape diagram Camile made to represent the problem. Try making a tape diagram to represent the math story.”
- High school: “Hey everybody! Look at the guess & check table Luz made to keep track of her guesses. Try making a table to record your guesses and checks.”
STEP 4: Sharing
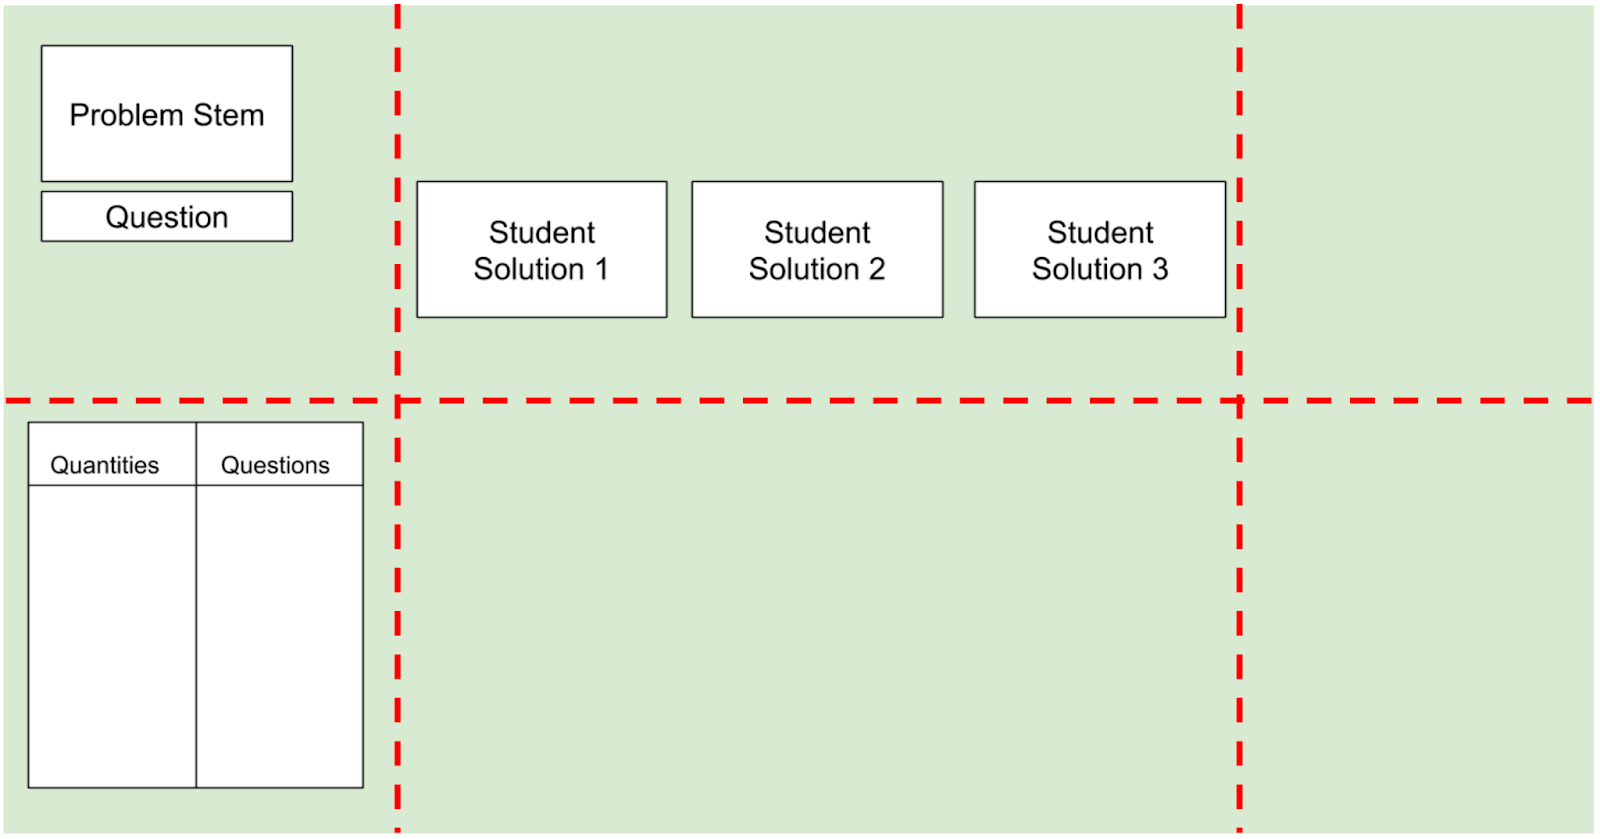
Select two or three students who are using (or tried to use) solution methods that you can use to nudge the entire class toward the objective of the lesson. Share those solution methods in a strategic sequence to advance student thinking toward the lesson’s objective.
In early grades I ask the student to briefly explain her thinking while I record it in the upper middle two-eighths of the whiteboard. For older students I am more likely to let them approach the board to recreate their thinking.
STEP 5: Discussion
After the two or three students have shared their solution methods, I use a different colored marker (I typically use orange…I don’t know why) to highlight connections between the methods and to amplify the key mathematical points I want students to practice in the next problem.
With students participating in the discussion, I make sure we summarize the key math concept students are learning in the lesson.

STEP 6: Application
I post a second problem for students to apply their new mathematical understanding. This second problem is virtually identical to the initial problem, but with different numbers. This problem acts almost like an exit ticket and provides me with insight about what I will teach in tomorrow’s lesson.
Students who are not yet comfortable using the new math concept from the day’s lesson are welcome to use any method they are most comfortable with. My job is to nudge students towards the next more sophisticated solution method.
STEP 7: Practice
Time permitting, I give students an additional two or three problems to solve independently. This is when I gather a small number of students for intervention and more direct instruction.
In a nutshell, I imagine the flow of the lesson to be in three parts: introduction, inquiry, and direct instruction.

Burying the lede: This style of lesson design in Japan is called Bansho. Specifically, bansho is refers to how the lesson is carefully laid out on the whiteboard. Regardless of what we call it, give this lesson flow a try in your classroom! It is very different from the cultural script we subconsciously follow for math instruction, but you will quickly get used to it! You will also see students surprise you with skills you did not know they possessed.
In next week’s blog post, I’ll share my system for planning one of these lessons. I’ll also include lesson planning templates to make your transition to this new style of teaching go more smoothly.
.
.
.